Themes & Plugins
How to add, configure, and manage themes and plugins with FetchPress.
Add a Theme
In the WordPress admin navigation, click the Add Theme tab under FetchPress.
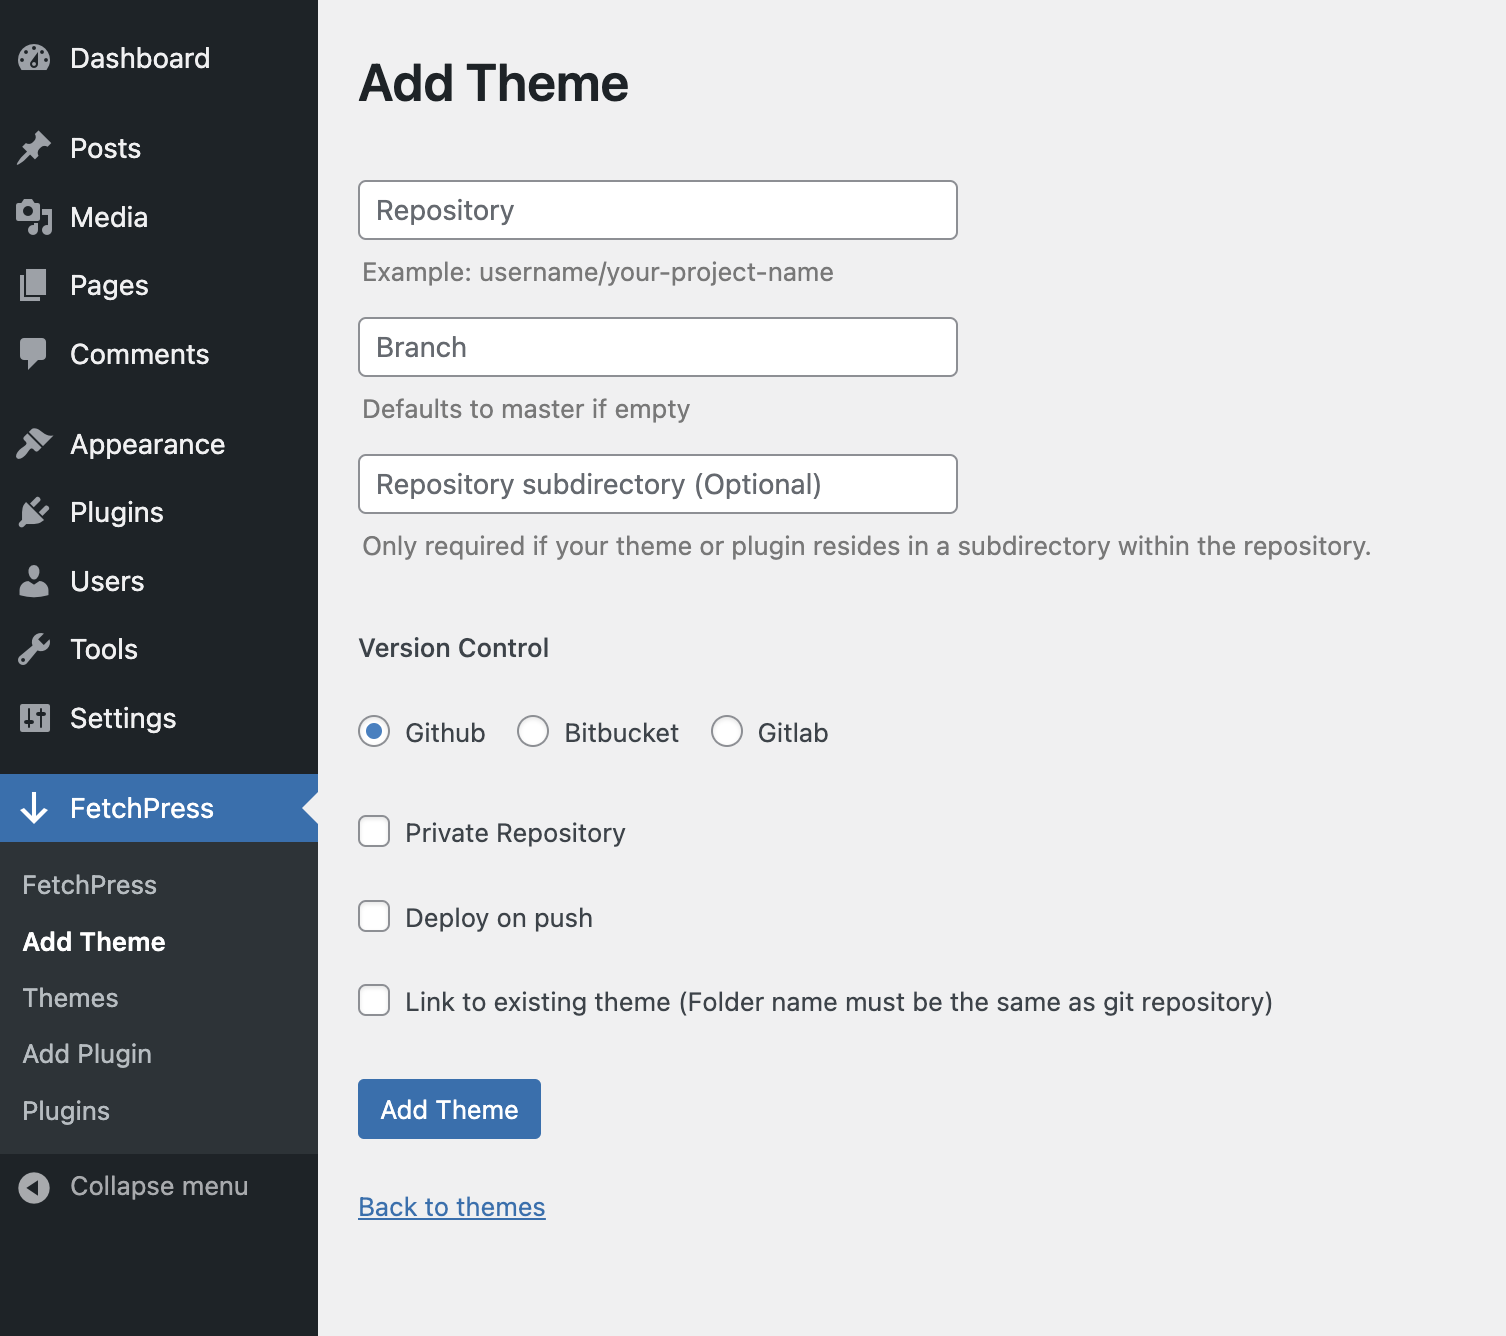
Fill out the form with your repository details:
RepositoryThe path to your repo — typically found in the URL of your version control platform (e.g.,username/my-theme).BranchThe branch to deploy from. Pushes to this branch will trigger automatic deployment when "Deploy on Push" is enabled.SubdirectoryOptional. If your theme lives inside a subdirectory of the repository, specify the path here.Version ControlSelect GitHub, Bitbucket, or GitLab.Private RepositoryCheck this if the repository is private. Requires an active license. LicensedDeploy on PushRegisters a webhook so FetchPress automatically deploys whenever you push to the configured branch.Link to Existing ThemeCheck this if the theme is already installed on the site. The repository name must match the theme's folder name.
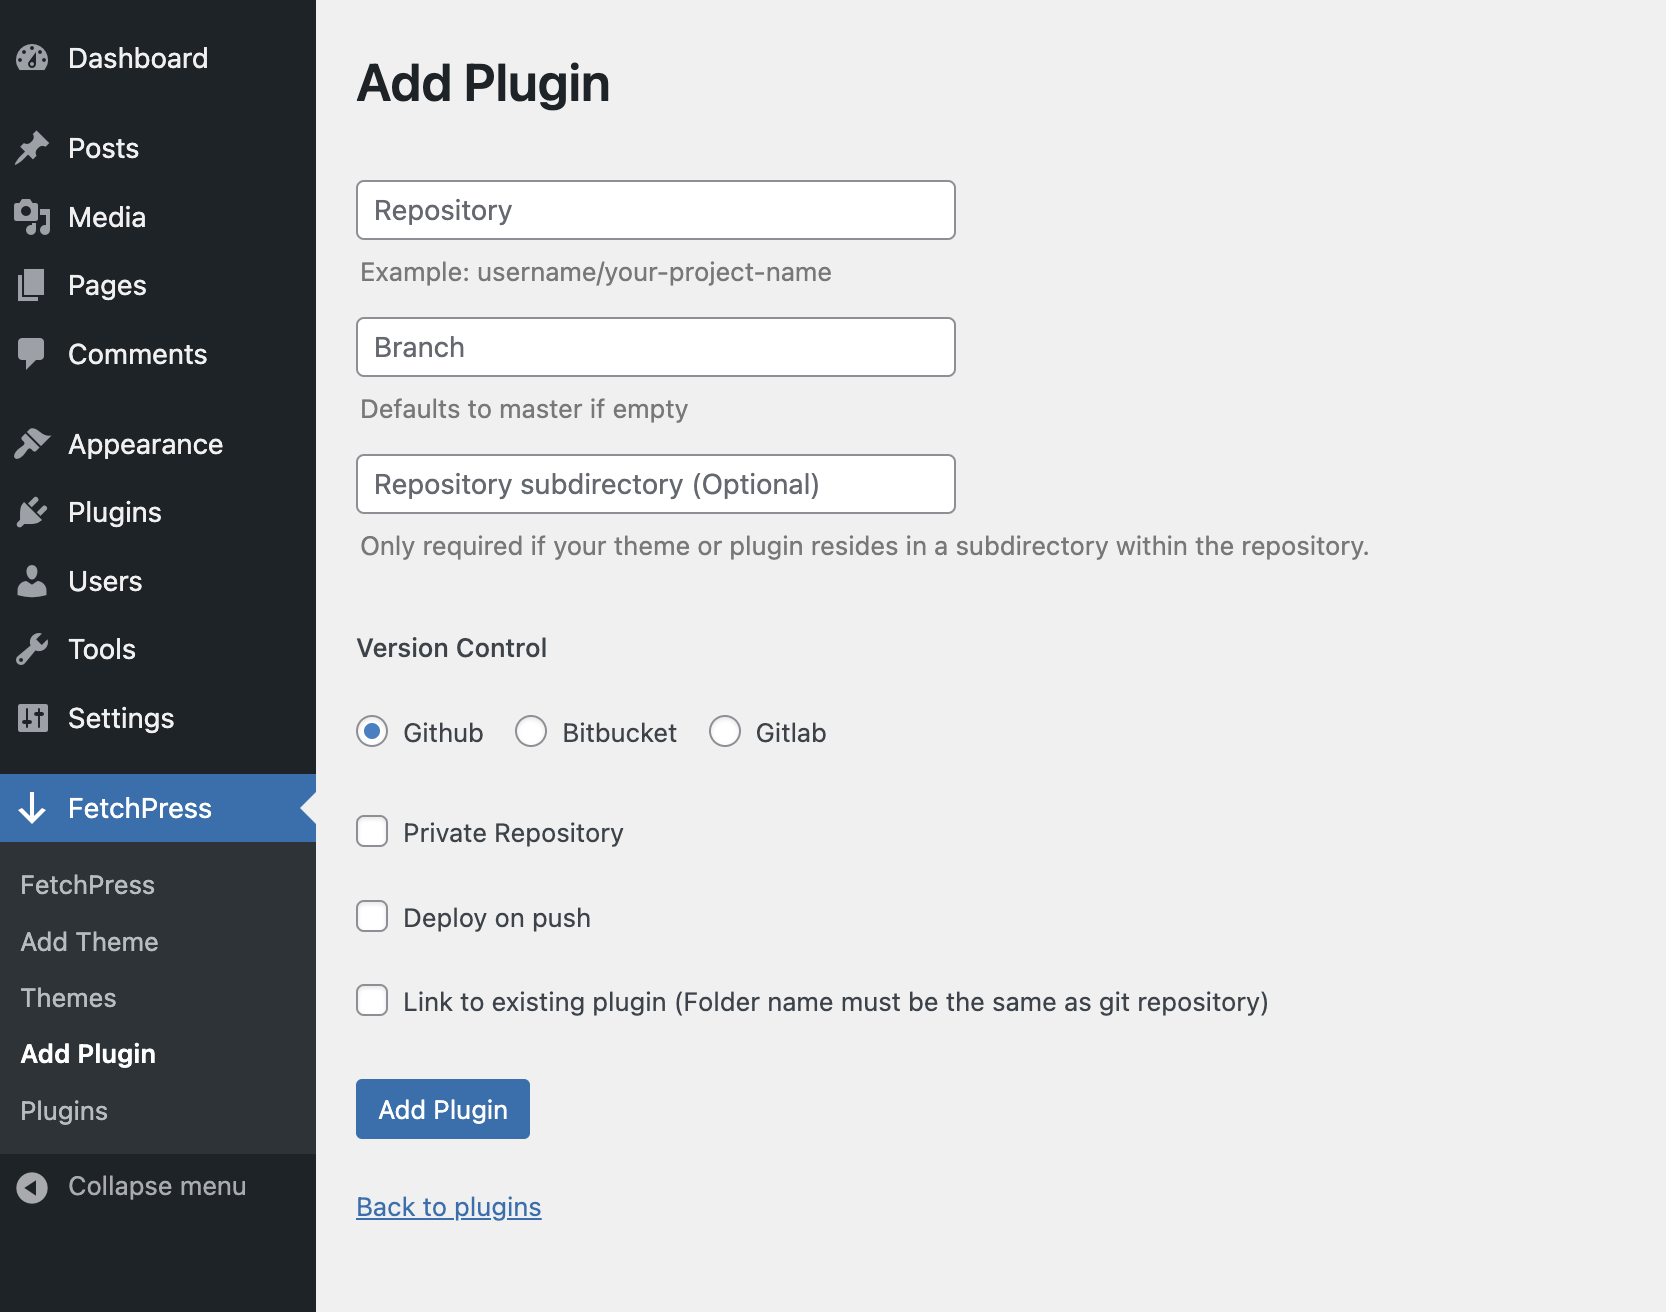
Add a Plugin
Click Add Plugin in the WordPress admin navigation. The setup process is identical to adding a theme — reference the field descriptions above.
Manage Themes & Plugins
Navigate to Themes or Plugins in the FetchPress admin menu to see all connected items.
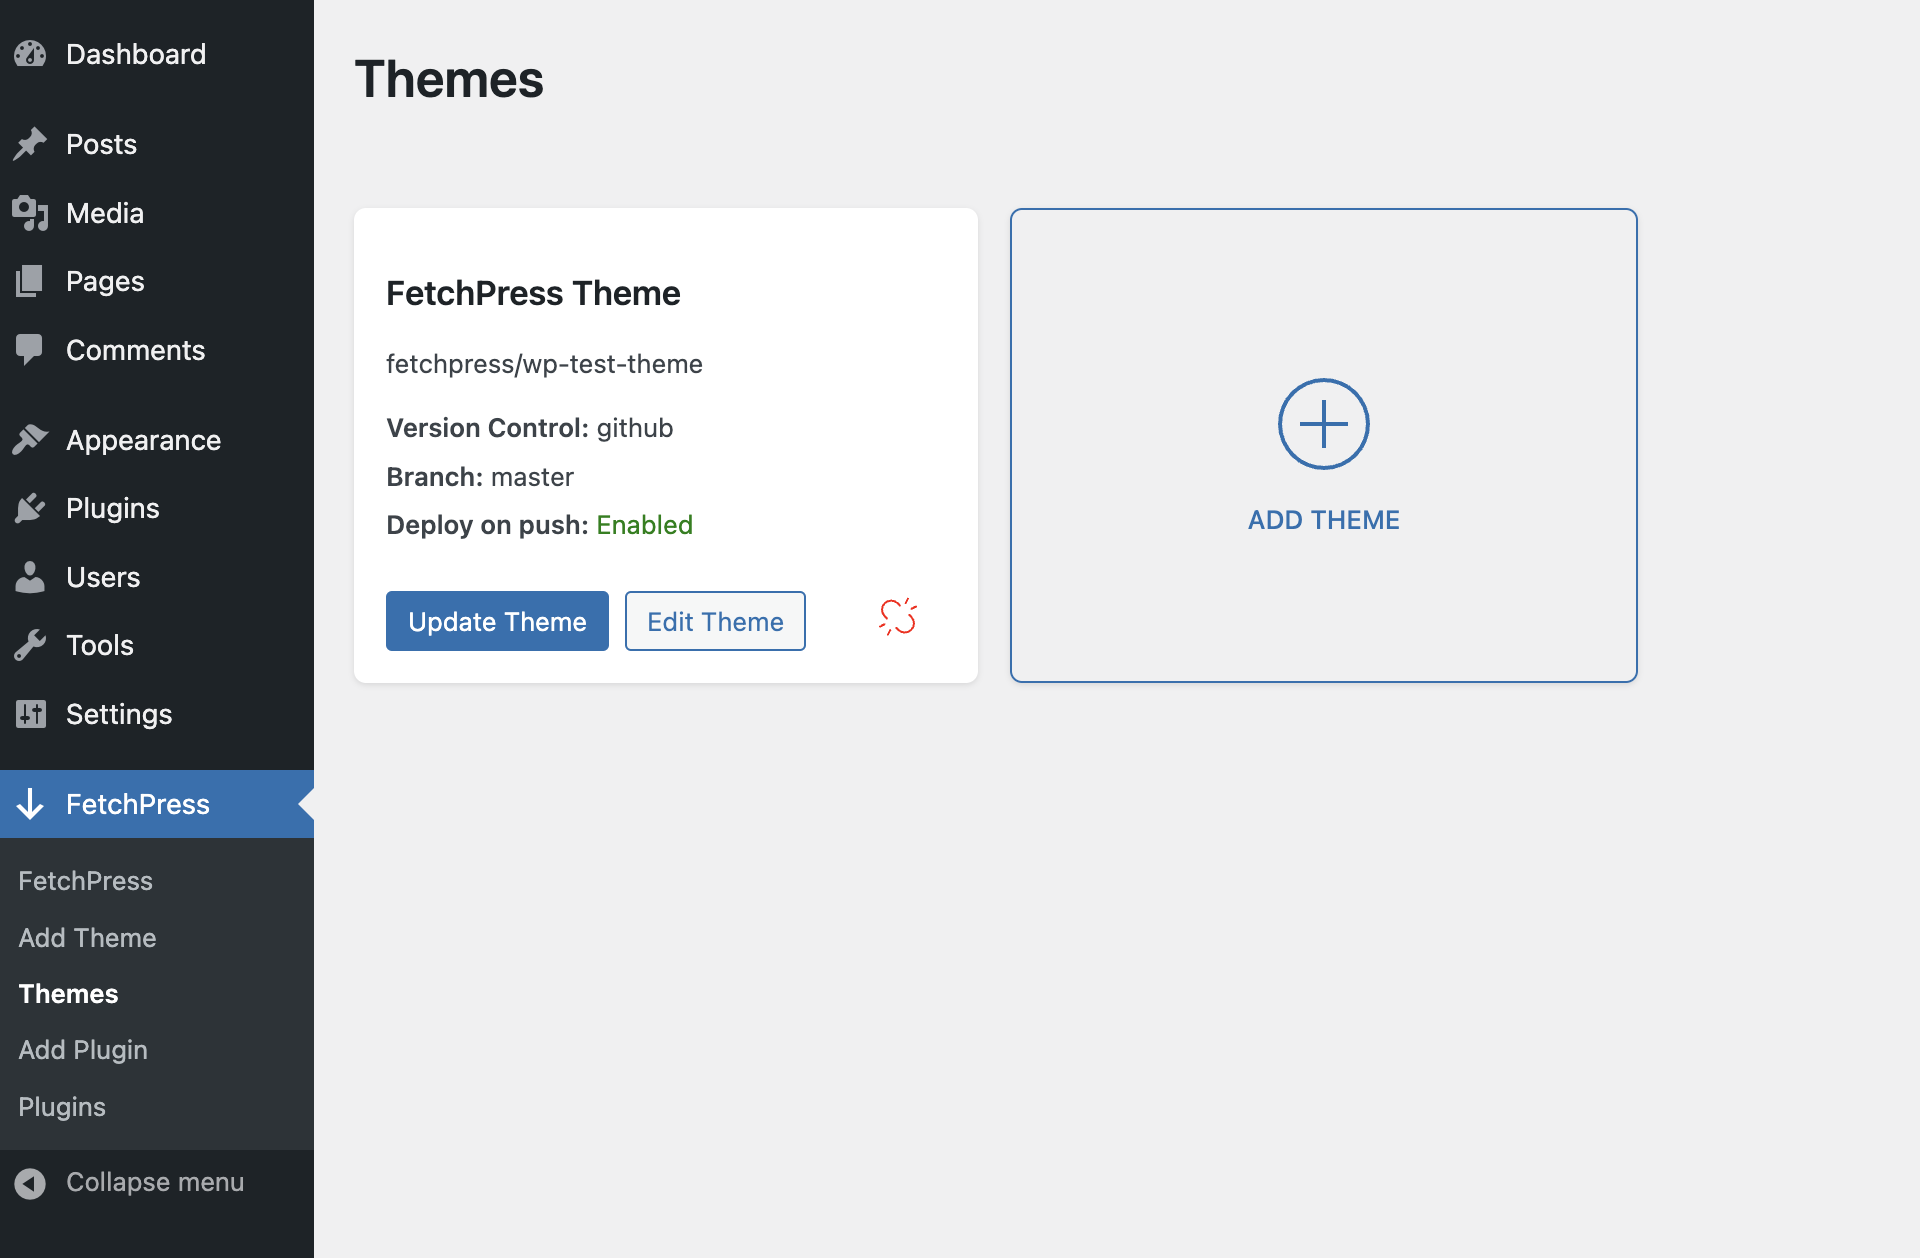
Each card has three controls:
UpdatePulls the latest code from your repository immediately. Use this for manual deployments when "Deploy on Push" is not enabled.EditOpens the configuration form so you can modify any of the settings you set when adding the theme or plugin.UnlinkDisconnects the theme or plugin from FetchPress. The code remains installed on your site — only the FetchPress connection is removed.
Free Plan Limits
The free plan supports one theme and one plugin on public repositories. When you reach the limit, the "Add" card will be locked with an upgrade prompt.
Upgrading to a paid plan removes these limits and also unlocks private repositories, deployment history, and one-click rollback.